

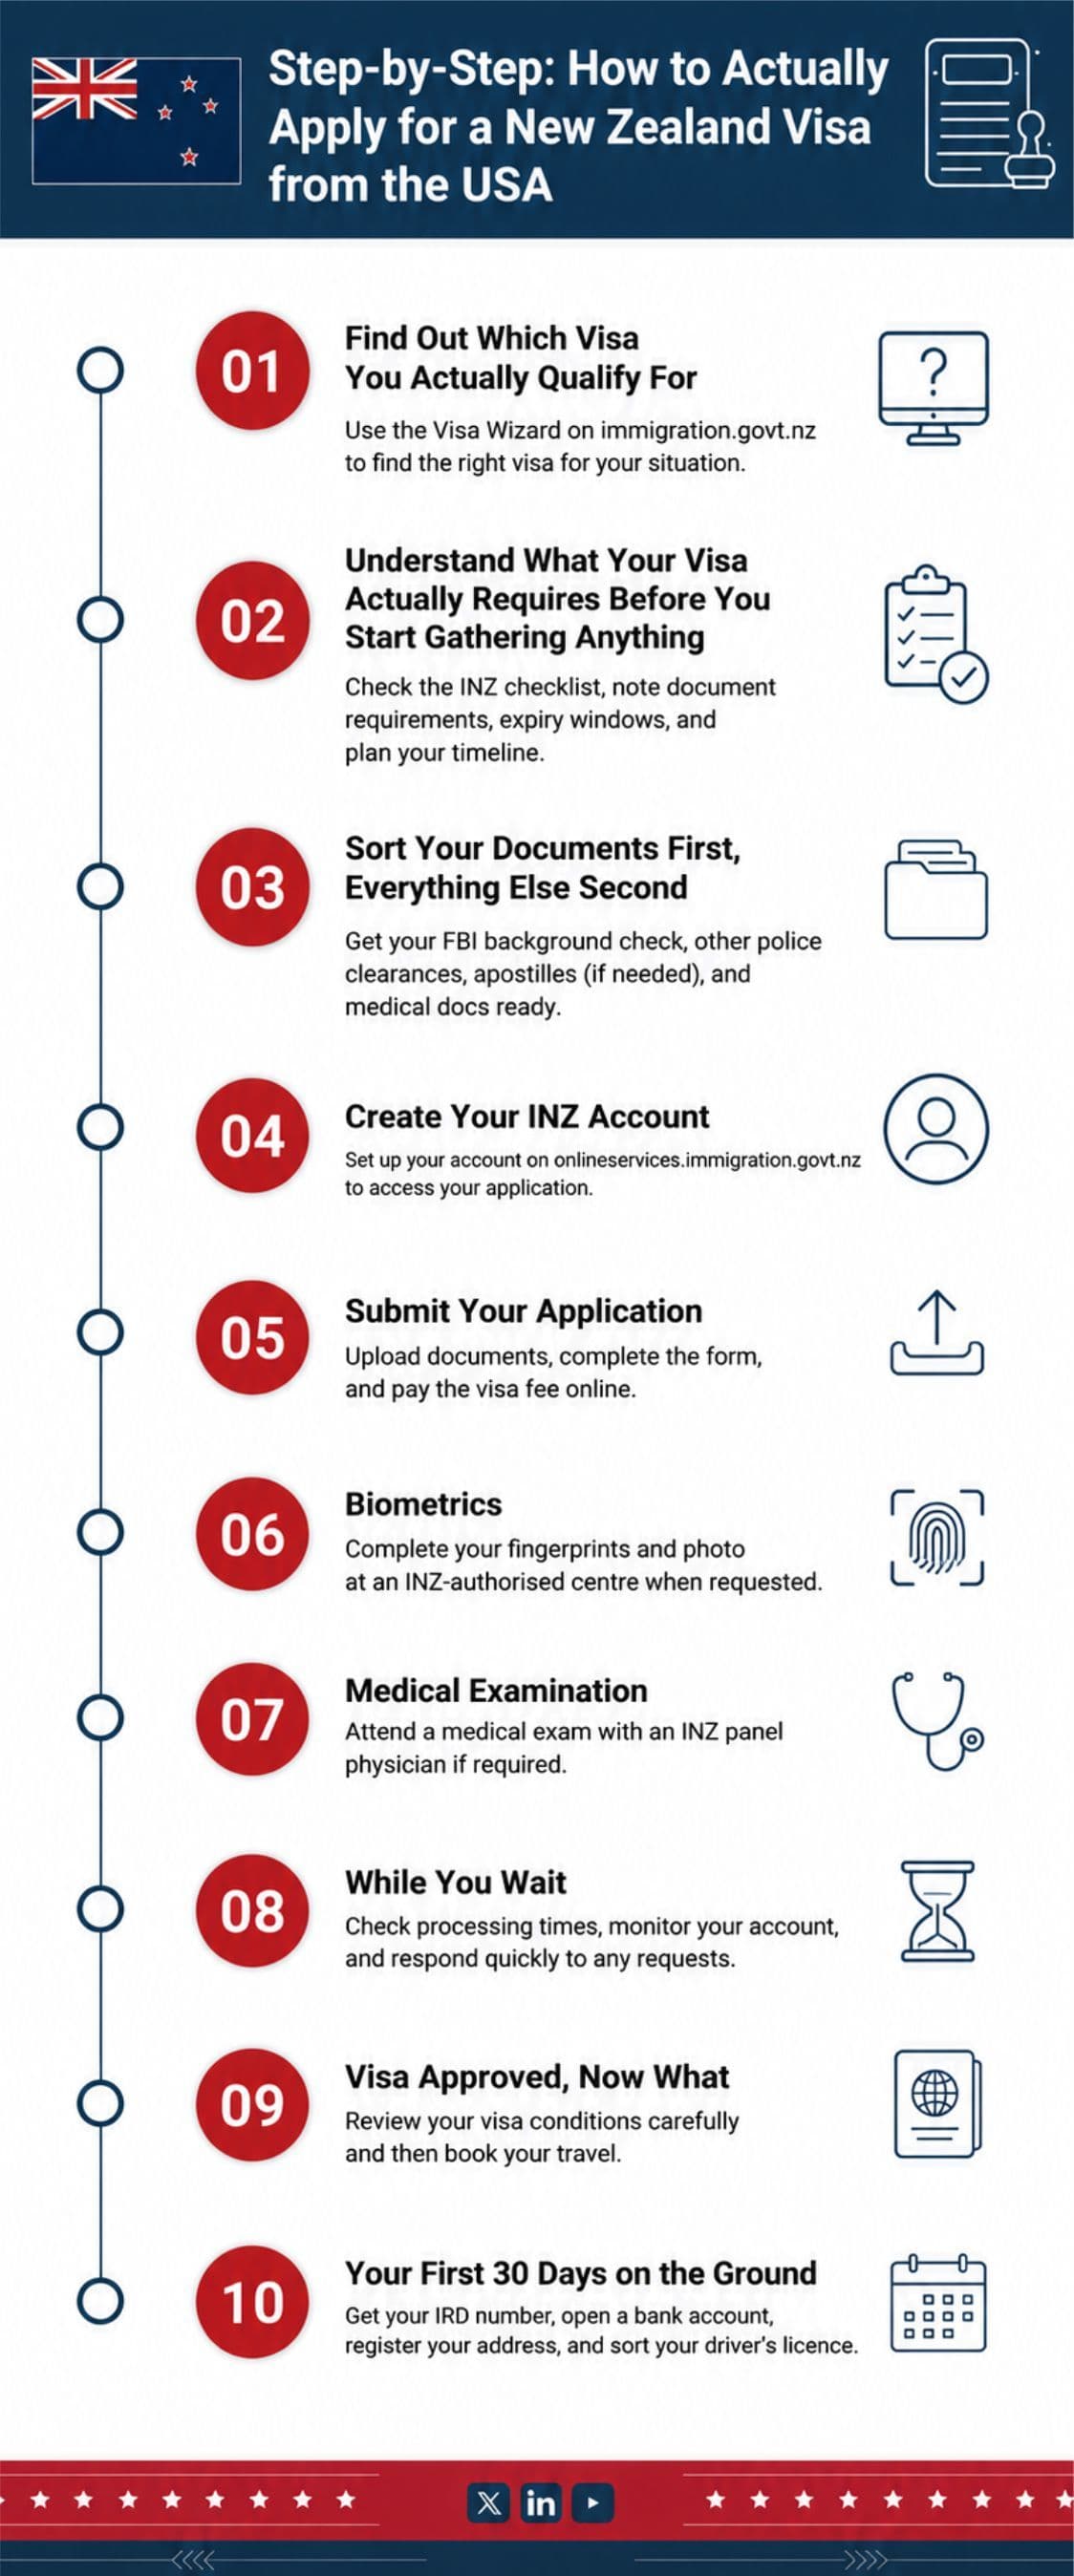
Applying for a New Zealand visa from the USA isn't complicated once you understand the sequence. Most people overthink it or waste months preparing the wrong documents for the wrong visa. The process itself is straightforward the main thing is knowing what order to do things in, and what to have ready before you start.
This is the full process, from your first search to your first month on the ground.
Before anything else, go to immigration.govt.nz and use the Visa Wizard. It asks you a series of questions your nationality, purpose of visit, how long you plan to stay, whether you have a job offer and narrows down which visa applies to your situation.
It takes about five minutes. Most people skip this and spend weeks researching visas that don't apply to them.
If the Visa Wizard points you somewhere unexpected, trust it. The New Zealand immigration process for Americans catches a lot of people off guard - particularly those who assume the skilled migrant route is their only option when the Green List or employer-sponsored pathway would get them there faster.
Once you know your visa category, the rest of the process follows a clear sequence.
Every visa has a specific document checklist on the INZ website. Pull it up before you start collecting anything.
The reason this matters: some documents have expiry windows. An FBI background check, for example, is only accepted if it's recent and getting one through the standard FBI mail-in process takes anywhere from 4-8 weeks. If you request it too early, it could expire before your application is ready. If you request it too late, it delays everything.
Read the requirements for your specific visa type. Note which documents need to be apostilled, which need certified translations, and which have date restrictions. Build a simple checklist and work backward from when you want to submit.
This is where the New Zealand immigration steps for Americans take longer than expected not because the process is difficult, but because American-specific documents take time.
FBI Background Check
Required for most residence and long-stay work visas. You have two options:
The first is going directly through the FBI you submit fingerprints by mail and wait. The standard turnaround is 4-8 weeks. Results come back on paper.
The second is using an FBI-approved channeler a private service that processes the same check faster, usually in 2 to 4 weeks. It costs more, but for most people applying for a New Zealand skilled migrant visa from the USA, the time saving is worth the cost. IdentoGO is one of the largest approved channelers in the US.
Some visas also require a state-level Criminal Record Check. Check whether your specific visa needs this alongside the FBI check requirements vary by visa category and how long you've lived in each state.
Documents That Need Apostille
New Zealand is a member of the Hague Apostille Convention, but INZ does not routinely require apostilles on US documents for standard visa applications. Original certified copies from the issuing authority are generally accepted. An apostille may be required in specific circumstances, confirm with INZ or your immigration adviser whether your situation requires one before going through the process
The apostille is issued by the Secretary of State in the state where the document was issued, or by the US Department of State for federal documents like the FBI check. This step adds time if you leave it late, so build it into your timeline early.
Medical Documents
Some visa categories require an upfront medical examination. Others only request it after the application is submitted. INZ uses a system called eMedical you'll be directed to a panel physician in the USA who submits results directly to INZ through that system. You can't just bring a note from your doctor.
Check the INZ website for the current list of approved panel physicians in the US. They're in most major cities.
Go to onlineservices.immigration.govt.nz and create an account. This is where your entire application lives documents, correspondence, decisions, everything.
The account setup is simple. You'll need a valid email address, your passport details, and basic personal information. Don't use a work email address you might lose access to partway through the process. Use a personal email you check regularly.
Once your account is set up, you can see the application form for your visa type and understand exactly what fields need to be completed before you start filling anything in.
Once documents are gathered, apostilled where required, and your form is complete you submit through the INZ online portal.
Pay the visa fee at the time of submission. Fees vary by visa type and are listed in NZD on the INZ website. Convert the amount before you submit the charge will go through on your card at the current exchange rate.
After submission, you'll get a confirmation email with an application number. Save it. Every time you contact INZ about your application, you'll need to reference it.
A few things to check before you hit submit: make sure every document is a clear, readable scan. INZ regularly requests resubmission of documents that are blurry, cut off at the edges, or difficult to read. It's a simple thing that delays applications unnecessarily.
Most visa types require biometrics, fingerprints and a photograph. After submitting your application, INZ will send you a biometrics request through your online account if it's needed for your visa type. The request includes instructions on where and how to complete it.
Don't try to get this done before you receive the request. Biometrics have a validity window, and submitting them too early creates processing problems you don't want mid-application.
INZ works with authorised biometric collection centres across the United States. Major cities are covered, if you're in a smaller city or rural area, factor in the possibility of travelling to the nearest centre when you're planning your overall timeline.
Once your appointment is done, the results go directly to INZ. You don't need to submit anything separately.
If your visa requires an upfront medical, or if INZ requests one after submission, you'll be directed to a panel physician.
The examination covers general health, chest X-ray, and in some cases blood work, depending on the countries you've lived in and your intended stay length. Results go directly from the doctor to INZ through the eMedical system. You don't handle the paperwork yourself.
Book the appointment promptly once requested. Panel physician availability varies by city, and delays here can extend overall New Zealand visa processing time.
Processing times vary. The INZ website publishes current estimated timeframes by visa type, check them regularly, as they fluctuate with application volumes.
While your application is being processed, don't book non-refundable flights. Don't resign from your job. Don't give notice on your apartment. Processing estimates are not guarantees.If INZ requests additional information during processing, you'll receive a notification through your online account. Respond promptly and completely. Partial responses or delayed replies are one of the most common reasons applications stall.
If your application is taking longer than the published estimate, you can contact INZ through your online account to request an update. Don't do this repeatedly one follow-up after the estimate has passed is appropriate.
When your visa is approved, the decision comes through your INZ online account. Your visa is linked digitally to your passport there's no physical sticker or stamp for most visa types. Border officers can see it when you arrive.
Before you book anything, read the visa conditions carefully. They'll specify your start date, end date, any work restrictions, and which employer you're tied to if it's employer-sponsored. Breaching visa conditions, even accidentally, can affect future applications.
Now book your flights. New Zealand is a long way from anywhere in the continental US. Auckland to LA is around 12 hours minimum. Most Americans flying from the East Coast are looking at 17 to 20 hours with a connection. Factor that into your moving timeline, arrival day is not a functional day.
Landing in New Zealand with a visa is the beginning of the admin, not the end of it. Here's what to sort in your first month.
IRD Number
This is your Inland Revenue Department tax number the equivalent of a US Social Security Number for tax purposes. You cannot legally work without it.
Apply through the IRD website at ird.govt.nz. You'll need your passport and visa details. Processing usually takes 8 to 10 working days. Apply as soon as you arrive some employers will let you start work while waiting, but you'll need to declare you've applied.Bank Account
Most New Zealand banks ANZ, ASB, Westpac, BNZ, Kiwibank allow immigrants to open accounts before arrival or within the first week. You'll need your passport, proof of address in New Zealand, and your visa details.
If you don't have an NZ address yet, some banks will accept a hostel or temporary accommodation address to get the account open. Sort this in week one. You'll need it for your employer's payroll, for rent payments, and for pretty much everything else.
Address Registration
New Zealand doesn't have a formal national address registration system the way some countries do, but your address is connected to your IRD record, your bank account, and eventually your driver's licence. Keep it updated as you move, particularly with IRD, as that's how your tax code and any rebates are handled.
Driver's Licence
US licence holders can drive in New Zealand for up to 12 months on their American licence alongside an English translation if the licence isn't in English. After 12 months, you'll need to convert to a New Zealand licence. Start that process before the 12 months are up the conversion involves a theory test for most applicants.
From the day you decide to apply to the day you land, most Americans are looking at a minimum of 6 to 9 months when factoring in document collection, FBI background check processing, apostille steps, and visa processing time.
For residence visas, the timeline extends further. The Skilled Migrant Category alone can take 12 months or more from submission to decision.
| Stage | Estimated Time |
| FBI background check (channeler) | 2–4 weeks |
| FBI background check (direct mail) | 3–4 months |
| Apostille processing (state level) | 1–6 weeks depending on state |
| Apostille processing (federal) | 6–8 weeks |
| Visa application processing (work visas) | 4–8 weeks |
| Visa application processing (residence) | 3–12 months |
| Biometrics appointment | 1–2 weeks after request |
| Medical examination | 1–2 weeks after request |
All timeframes are current estimates and subject to change. Verify on the INZ website before planning your timeline.
Need help with your application or background check?
Contact us now and speak with a dedicated Globeia expert today.

